Oracle Eloqua Form Integration
Fabl features a direct integration with your Eloqua account.
Below you can find the documentation provided by Eloqua for setting up forms on their platform:
1. Connecting your Fabl account with Eloqua

To start adding Eloqua forms to your story, first you will have to connect your Fabl account with your Eloqua account.
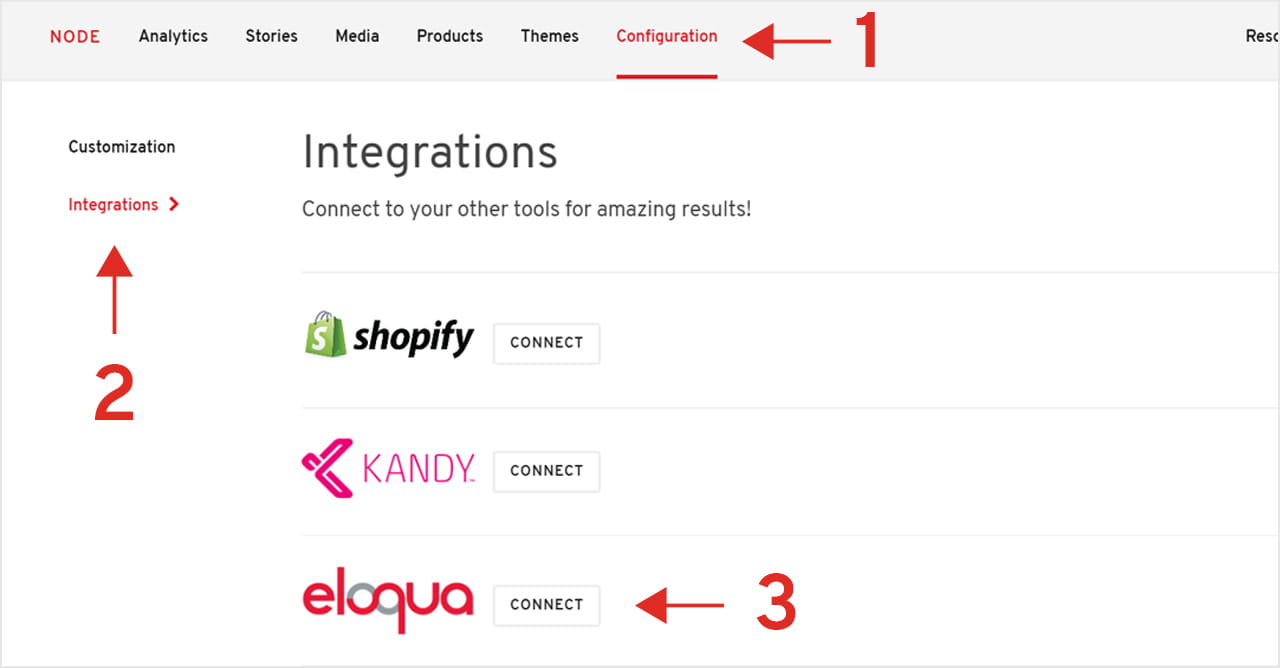
To do this, navigate to the Configuration (1) tab in your Fabl Dashboard and under Integrations (2) click on the CONNECT (3) button found on the right side of the Eloqua logo. This action will redirect you to the Eloqua login page, where you can login with your account and follow all the steps required to set up the integration.

2. Adding Eloqua Forms to your story

After you’ve connected Fabl with your Eloqua account, you can go into the story editor and scroll down to the section where you’d like to place your form.
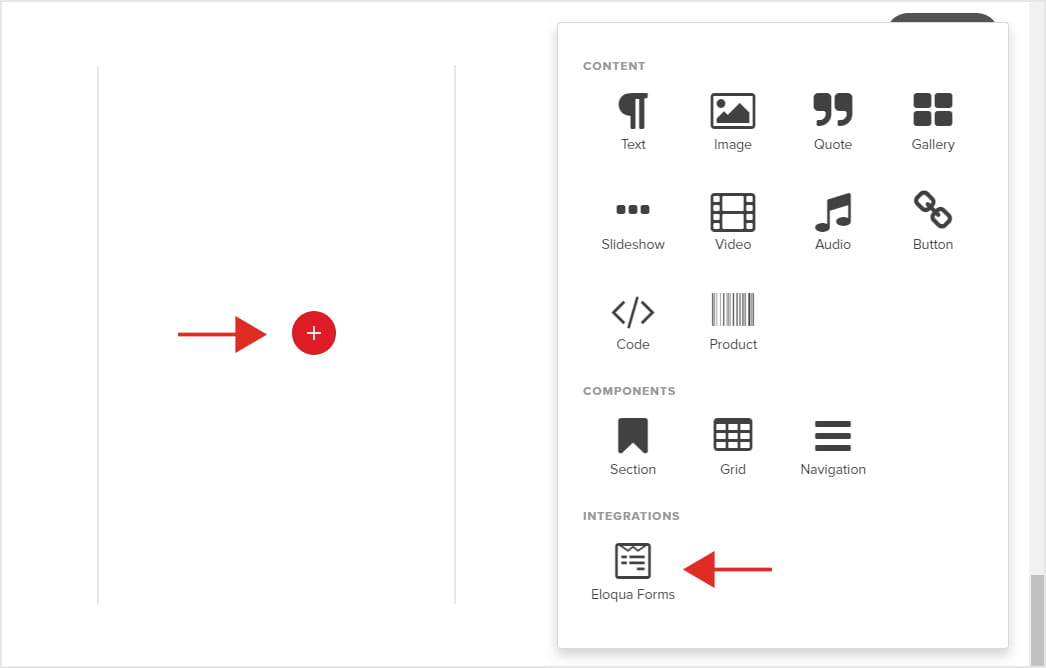
Click on the red “+” icon and select “Eloqua Forms”. Then, make your selection for the form you’d like to use by going to the Options tab and choosing it from your list.


3. Selecting your form

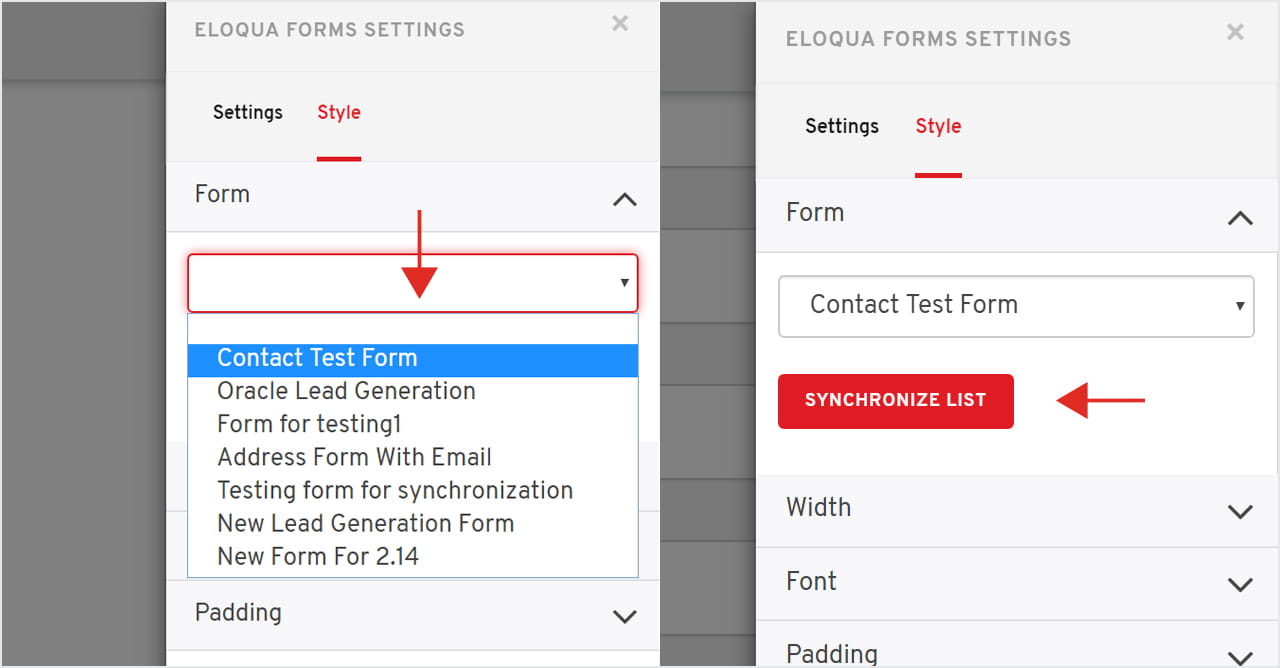
After you’ve added your Eloqua form to your story, go into Settings and open the “Form” drop-down menu. Here you can select which form from your Eloqua account you want to display in your story.
NOTE: If you’re not seeing all your Eloqua form fields in the drop-down menu, use the “SYNCHRONIZE LIST” option to update your list.

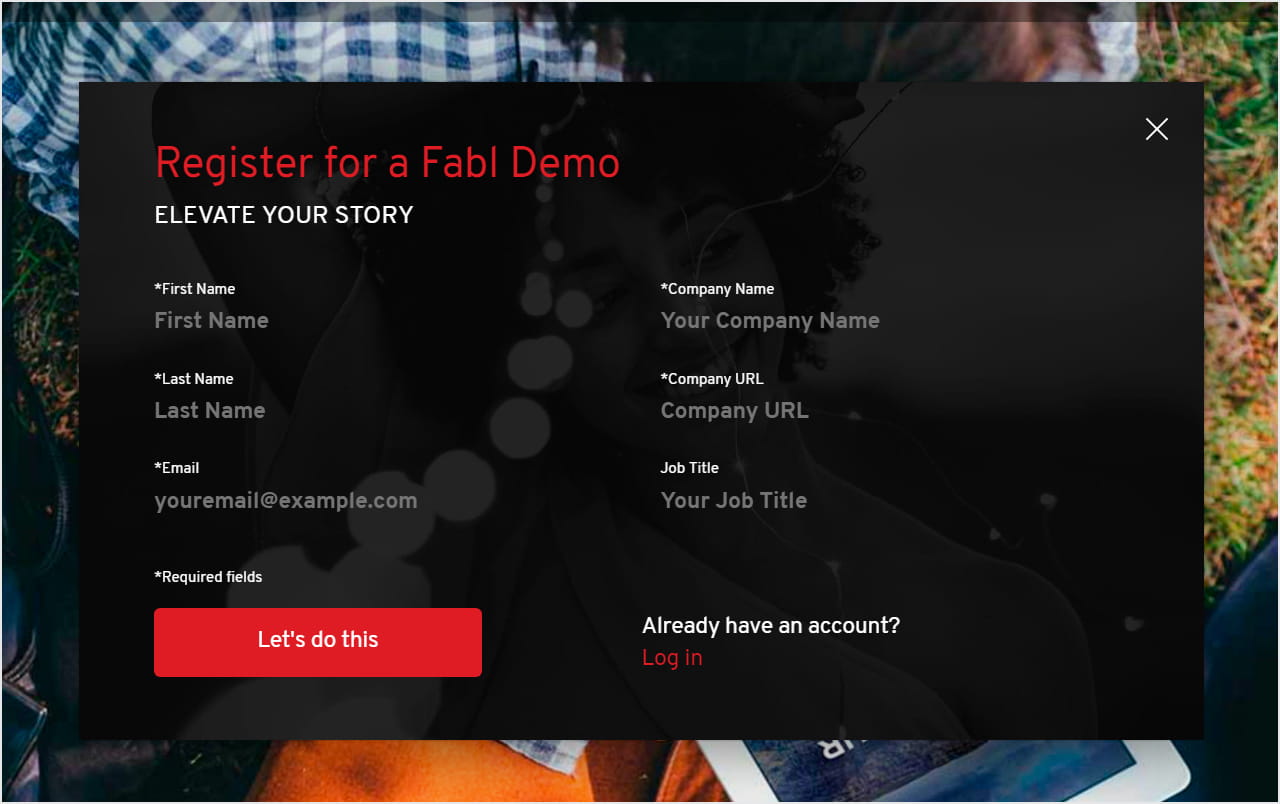
Once you’ve selected your form, this will be displayed in your story (see example below):

4. Do a final check up

Before you start promoting your story, review the form’s functionality and styling both on desktop and mobile devices. If you need to make further adjustments, head back to your 3rd party tool, make the changes to the form, and generate a new code snippet that contains all your updates. Make sure you replace the initial code with the updated version.
To review your form you can either open your story URL on your physical devices or use the PREVIEW option from to bottom right area of your screen. This allows you to easily switch between mobile, tablet and desktop view.


Already an experienced user?
See what else you can do to enhance your story.
Content Elements